.
Have you been noticing all the wheat bundles at the stores lately? It seems like every store I go in has them for sale with their Fall decor.
.
.
But the ones I saw weren't exactly cheap. I saw a small one the other day for $30. I decided that it would be pretty easy to make my own for much less.
.
.
Here's what you need:
- 2 bundles of dried wheat. Mine came from Michael's
- 1 small bundle of dried grass. I reused some that I already had, but you can find this in the same aisle as the wheat @ Michael's
- 1 block of floral foam
- glue gun & glue sticks
- brown kraft paper
- twine or ribbon
.
.
1. Cut the floral foam into two circles. The diameter of the circle will determine how wide your bundle will be. Secure the two pieces of foam together with glue from the glue gun.
.
.
2. Cut a piece of kraft paper wide enough to wrap around the foam. The height of the paper should be just a little higher than the foam. Secure the paper around the foam with glue. Fold over the extra at the bottom and secure with glue.
.
.
4. Start by attaching small sections of grass with the glue. Continue until you have grass all the way around.
.
.
5. Use scissors to go all around the bottom and trim the grass.
.
6. Now get your wheat and use the glue gun to attach it all the way around. Just do a small section at a time. When you are finished, trim at the bottom just like you did with the grass.
.
.
7. This step is important: Use leftover grass and wheat in the center of the bundle. Just gather up small clusters and stick in in the center. It will go in very easily in the foam. No need for the glue gun. If you don't do this the bundle looks very bare.
.
.
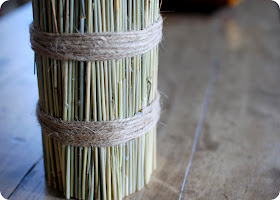
8. Wrap twine around the base of the bundle. Secure with a small amount of glue.
.
Easy, right? And for around $10 it was much cheaper than any I saw in the stores.
.
Here's a close up of the twine:
.
.
Fits in perfectly with all Fall decor.
.
.
.
.
This post is linked to:
Frugalicious Fridays @ Finding Fabulous
Exodus 35 Creativity Party @ Let Birds Fly
Polly Want a Crafter
Nifty Thrifty Tuesdays @ Coastal Charm
Tutorials and Tips @ Home Stories A to Z
Fall Craft Party @ Censational Girl
We Did it Wednesday @ Sew Much Ado
This post is linked to:
Frugalicious Fridays @ Finding Fabulous
Exodus 35 Creativity Party @ Let Birds Fly
Polly Want a Crafter
Nifty Thrifty Tuesdays @ Coastal Charm
Tutorials and Tips @ Home Stories A to Z
Fall Craft Party @ Censational Girl
We Did it Wednesday @ Sew Much Ado


You know I love this! It turned out fabulous!
ReplyDeleteneat! i've always hestitated buying like 4 bundles, just stretch one bundle instead. love it.
ReplyDeleteVery cool! Thanks for the step-by-step!
ReplyDeleteDearest Alissa,
ReplyDeletewhat a wonderfull idea, thanks so much to have shared this tutorial.
I want try to make one like it.
A big hug, Rosi
Great project and great tutorial. I will definitely be trying to make these. Thanks!
ReplyDeletePam
Love your wheat bundles! It looks so professional :)Thanks for sharing!
ReplyDeleteFabulous idea...It looks really great. Thanks so much for showing how to do it.
ReplyDeleteI'll be back later to link...
ReplyDeleteThanks for the really clear and easy to follow tutorial. They look really lovely. Take care, Laura
ReplyDeleteGorgeous!! I needed that tut! Thanks!!
ReplyDeletebeautiful!! i am pinning this! this is something you can keep safe and bring out for years! just lovely..
ReplyDeleteThis is such a great tutorial!! I may have to borrow this for my Thanksgiving table! I saw your post on Coastal Charm and had to come over. I am now following you and I hope you will follow me too. Blessings to you!
ReplyDeleteThis is so very pretty. I like your style! Love the gourds and amber pumpkins too.
ReplyDeleteYou are always the crafty clever one Alissa. Your wheat bundle is perfect for the season. I really need to do more "fall" decorating.
ReplyDelete